The instructions and files below will allow you to create your own model of the virus! All you need is some spare time and a 3D printer. In addition, those without access to a 3D printer can still use the STL files to request printing from external services and then follow the instructions on painting and assembling the same way. We do hope that this model will make the virus more tangible, and that the model will not only be printed as a private project, but also be used for outreach activities and in educational institutions.
Our design is based on the best scientific evidence available. Not only are the shapes of the various proteins as true as we can make them, but their numbers as well as the overall size of the virion match experimental results on a scale of 1:1,000,000. If you want to know more about it, please look here. Once you have built a model from our design you will have a good representation of what one of these virions is expected to look like, after being scaled up by a factor of 1,000,000. Therefore 1 mm on the model represents 1 nm (10 Å). (By the way, this would make the RNA that is inside the virus hull 10 metres long and 1 mm thick, and the nucleocapsid around which the RNA is coiled would be about 1 metre and 1 cm in diameter.
We have also designed a scale model of the human anti-body that binds to the spike protein. This is available alongside the virus model and can be attached to the spike protein as desired. For easier printing, painting, and assembly, the virus structure has been broken down into 4 unique components:
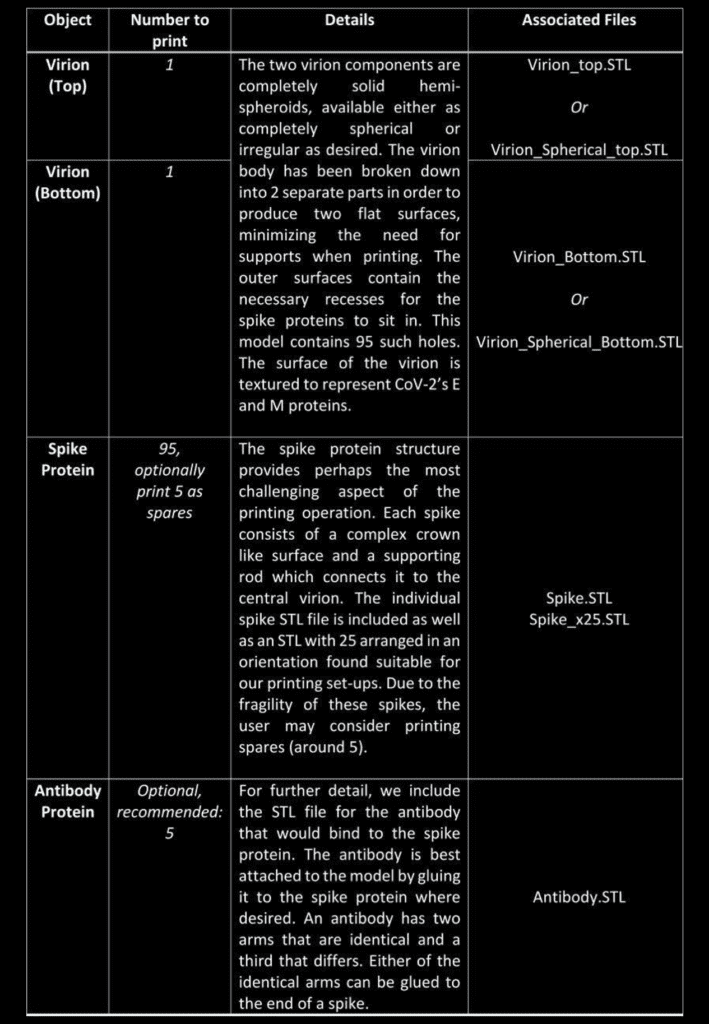
To date the structures have been printed successfully on several Fused Deposition Modelling (FDM) printers (Rostok MAX v2 & Prusa I3 MK3 printers), and we anticipate the even higher quality structures will be feasible with alternate methods, such as stereolithography (watch this space). Let us know in the comments! Each of the parts is available in STL format and should be printable through any suitable slicer software. Personal discretion is advised when setting up the prints, as the exact details may differ depending on conditions and equipment. The procedure outlined below will serve as a good starting point.
Printing of the component parts
The first step is to print the individual components. For the virion parts this is very straight forward as the flat surface negates the need for supports. The virion objects can be printed with the minimum infill for support, though infill of 10% is recommended for rigidity.
The other parts (spike proteins and antibodies) provide a more challenging print. The spike protein must be printed 95 times to complete the model, and users can arrange these individually, or using 4 prints of 25x STL file. It is recommended that the spike protein is printed with the crown facing towards the print bed to maximize the support between the bed and eliminating the need to remove supports from the thin delicate stem.
A dual extruder printer would be ideal for spike printing as it would allow supports to be printed in a water soluble plastic, speeding up post-processing. In either case, printing individual or at least fewer spikes with greater spacing generally produces nicer objects that are easier to work with at the price of longer printing time. Indeed, there is a general trade-off between the convenience of the print set-up and the amount of post-processing and tidying needed for all 3D printing tasks, and one must find a compromise which satisfies them.
As stated above, we used FDM printing and ubiquitous poly-lactic acid (PLA), which made the post-processing easier.
Post-processing
Regardless of the approach taken for printing, some amount of tidying will typically be needed to get the objects ready for assembly. Removing the supports can be done with a pair of plyers, while the smaller artifacts and issues will need brushing off or sanding. A dental pick can be quite useful.
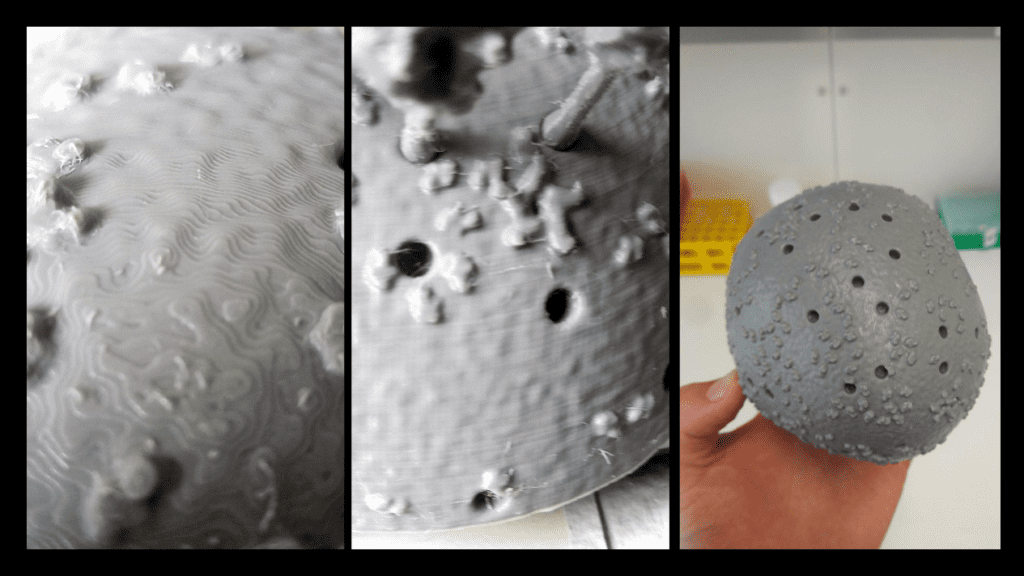
For PLA, we found the best thing to clean and smooth the surfaces (after support removal), is ethyl acetate. Ethyl acetate dissolves the plastic, breaking down the small extrusion artifacts on the surfaces. This can be used in many ways. We found it best to leave the parts in a sealed ethyl acetate vapour environment, such as a stainless steel pot, which should be cleaned carefully afterwards. This technique results in the most even and clean results, though will take up to a few days to fully smooth each object. The faster method, is to simply submerge the small objects in ethyl acetate for 10-30 seconds, and then remove each object, leaving them to dry out on a surface. For the larger virion parts, the surface can be smoothed by rubbing it down with a cloth damped with ethyl acetate. Ethyl acetate was also used to “weld” the two virion parts together. A small amount was dropped onto the flat surfaces on each section, before the two were pressed together until the plastic fused to become a single object. The seam was then smoothed down using the same process as before. Where one cannot get ethyl acetate from a lab or pharmacy, acetone-free nail-polish remover offers a commercially accessible alternative. you should be using safety glasses and suitable (!) gloves when handling ethyl acetate, ventilate the room well and if there was skin contact use a skin cream after hand washing.
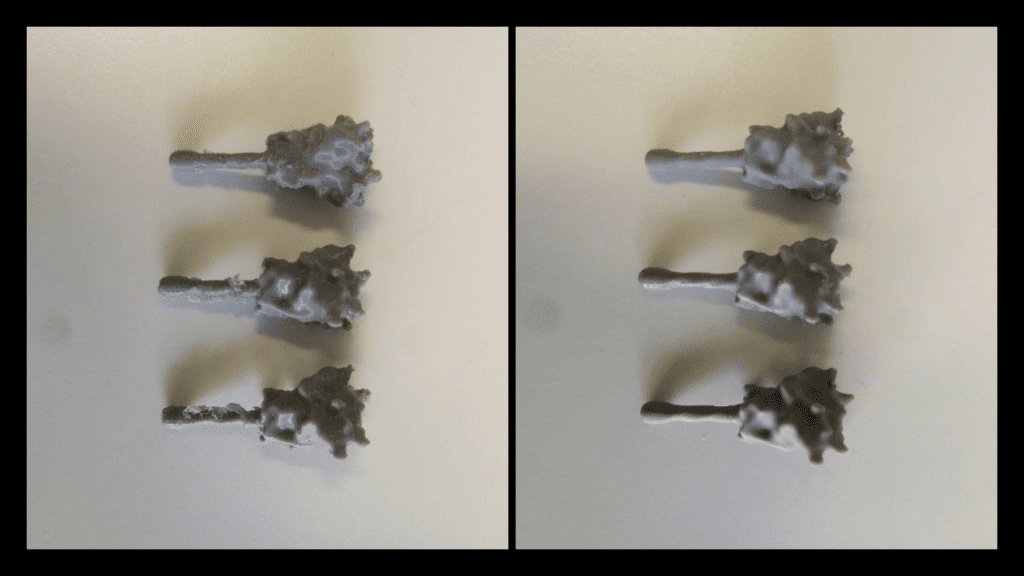
It is worth noting that for the other common 3D printing material acrylonitrile butadiene styrene (ABS) or acetone may produce the same results.
Painting and Gluing
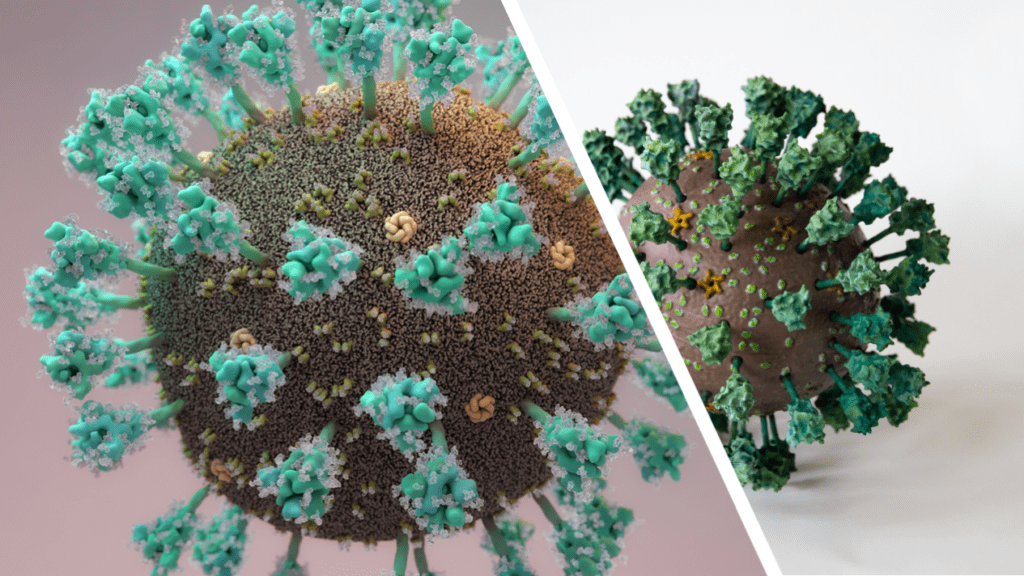
As with printing, painting methods and colours is down to personal preference, and here we outline our attempt, which was guided by the illustration by Thomas Splettstoesser as close as possible (see Fig. 3).
The parts were first treated with a primer to help the paint stick to the model. This also acts as a nice even Basecoat. When working with either primer or, as discussed later, an airbrush, one should consider safety: try to do as much as you can in a ventilated space, wearing safety goggles, gloves and a mask. Paint spraying produces a great number of fine particles which you don`t want to breathe in.
For us, the painting process was performed largely with an airbrush, and we highly recommend using one where available, due to the amount of painting required and surface complexity. Where not available, it can of course be done with just a simple brush which will take more time and a higher skill level.
All layer colours, medium thinner, base colours, primer and varnish we used were from Citadel painting. Here is an outline of the specific Citadel colours and materials we used for the model in the figures:
- Lime: “Moot green”
- Yellow: “Yriel Yellow”
- Grey: “Dawnstone”
- Wheat: “Baneblade Brown”
- Chocolate: “Doombull Brown”
- Aqua: “Gauss Blaster Green”
- Teal: “Kabalite Green”
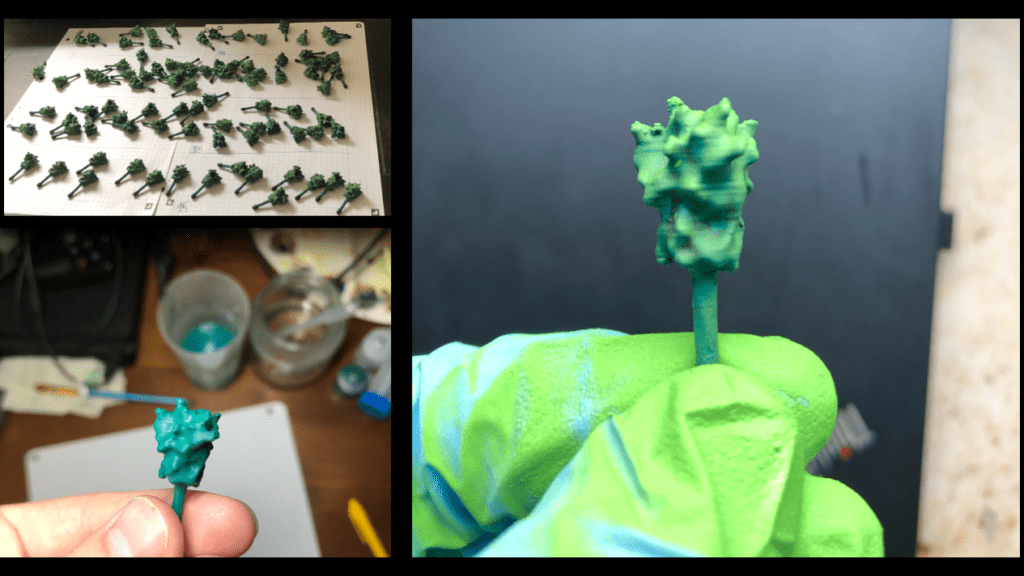
The spikes were sorted into four sets in order to produce a graded lighting affect, with those on top brighter than those lower down. If you do not plan to use a base and do not have a fixed top and bottom you can skip this part.
We highlighted each Spike Protein with a brighter lime green to achieve more contrast to create depth, which makes the surface topology easier to distinguish. Finally, the highlighting of each spike was intensified by dry-brushing the protein with the “Aqua” colour.
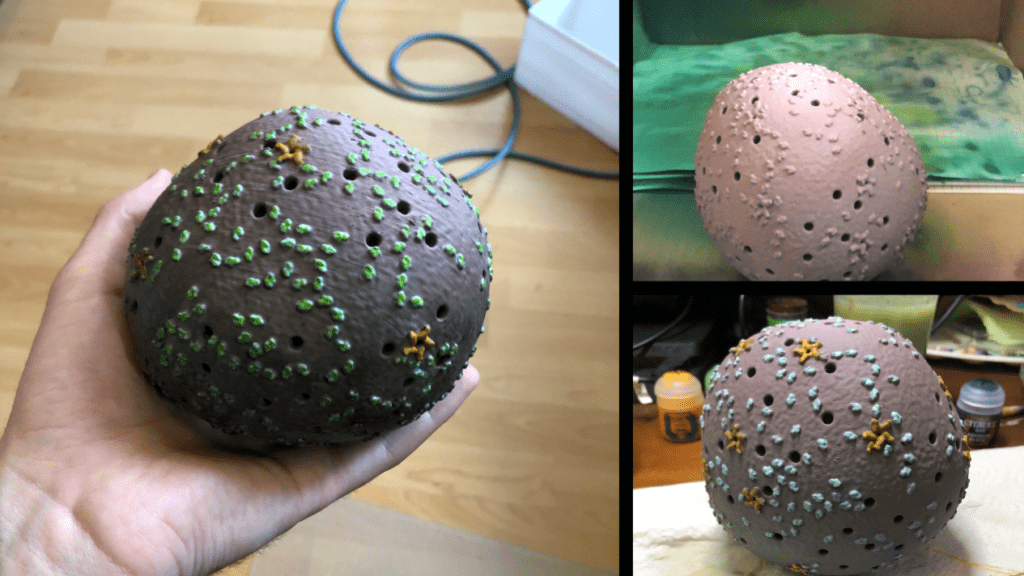
After painting was complete the spikes and virion were sealed with gloss varnish and matte finish, respectively. This step is optional; however, the varnish protects the paints against damage and wear when being handled.
Finally, the 3D model was assembled. If highlighting was used in the painting step, one should ensure the spikes are placed so that brighter spikes go on top while darker ones at the bottom. Standard modeling glue was used to hold the spikes in place, though superglue or ethyl acetate would also work fine. Because we are planning on mounting this on a stand, we have left a hole at the bottom empty where the rod of our base will go in.
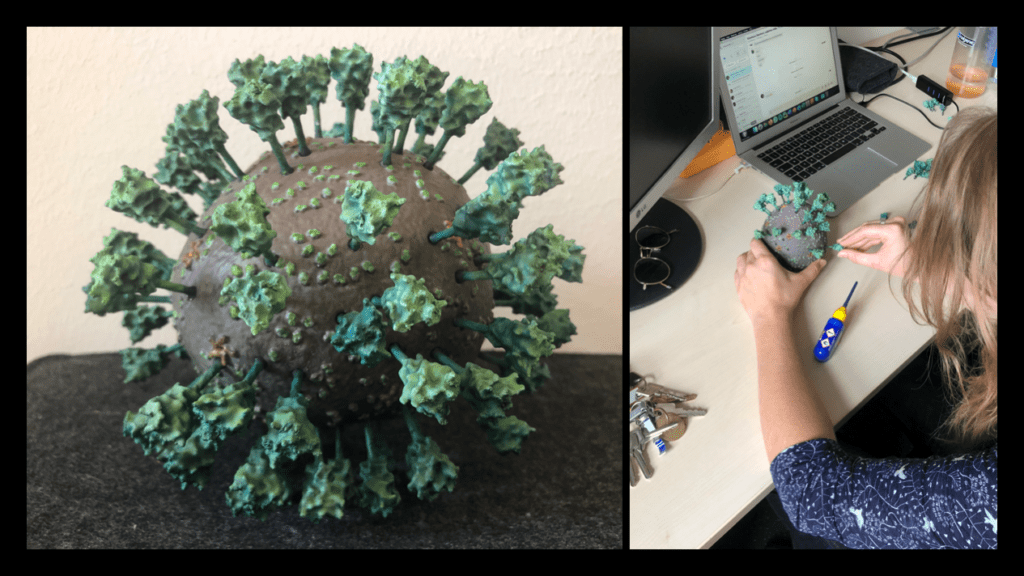
We hope that our adventure in 3D printing the Corona virus inspires you to give it a try! The process we described was completed in a little over a week. The printing jobs were completed in just over two days, the cleaning and post processing took another two days, while the painting was done over the course of a weekend. This article provides a description of our technique and should provide enough detail on how, with the outlined necessary tools, you could create a similar result. The files have been distributed through Thingiverse, and are distributed under a Creative Commons BY-NC license: You may remix, adapt, and build upon this work non-commercially and acknowledge the "Coronavirus Structural Task Force" as original author.
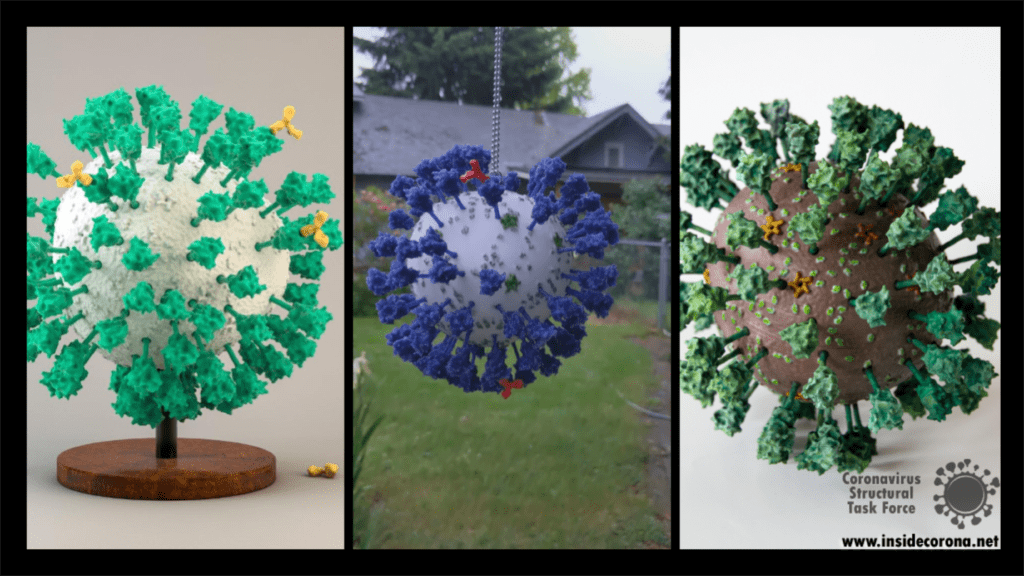
As with every 3D printed model, there are many different ways this could be tackled and achieved, and we look forward to seeing the many creative ways explored by others in this endeavor. Please do share experiences and results with us, either through the comments Thingiverse or on Twitter (you can tag us @thornlab or #insidecorona).
For a sense of perspective, we have also produced a model of the highly common rhinovirus, which is available in .stl format at the same scale as the corona virus objects. This is available at: https://www.thingiverse.com/thing:4556845.
Authors
We want to emphasize that the writing of this blog entry was a collaboration of a several people:
Dale Tronrud and Thomas Splettstoesser worked together to create the STL files for the 3D model. Dale was the person to suggest it first (with Andrea Thorn picking up on the idea). Thomas then selected the experimental models and placed all the parts to form a realistic representation. Dale provided the knowledge about the limitations imposed by the nature of 3D printing and broke up Thomas' model into printable parts that can be assembled without too much difficulty. He printed and assembled the first virion from this design.
Matt Reeves was responsible for improving the non-spherical virion model and the printing of the Würzburg model. He also determined the most suitable post-print processing techniques suitable for this project and, along with Dale and others on the team, contributed to many general technical discussions on how the model can be altered or improved further in the future.
Kristopher Nolte took part in the preprocessing and refining of the model together with Ferdinand Kirsten. Kristopher was also responsible for planning and carrying out the assembly and painting process of the Würzburg model.

Hi, looks like your model isn't spherical (top/bottom) and you include a spherical bottom part. which ones fit together? looks challenging but really good...thanks.
Our models on Thingiverse allow you to build either a spherical or non-spherical body to the virus. We prefer the oddly shaped one and print Virion_Top.stl and Virion_Bottom.stl. If you like balls you can print Virion_Spherical_Top.stl and Virion_Spherical_Bottom.stl. Each of these two parts fit to their mates pretty well, but you can have problems if your slicer does something funny to make the object stick to the base of your printer.